

Key Takeaways
Why Routine Plumbing Maintenance Matters
Plumbing problems rarely appear out of nowhere. A washing machine hose that bursts, a water heater that stops working, or a slow drain that becomes a standing backup - these usually follow months or years of gradual wear that regular inspection would have caught. The good news is that many of the tasks that prevent these failures are genuinely accessible to a careful homeowner, require no special licensing, and cost very little to do.
This guide focuses exclusively on fixture-level and appliance-level upkeep. None of these tasks involve opening walls, working on the main supply line, soldering pipes, or touching gas connections - work that should always be done by a licensed professional. Think of it as the plumbing equivalent of changing your car's air filter: sensible preventive care that keeps the bigger systems running longer.
For context on where these tasks fit throughout the year, see the seasonal home maintenance calendar - it pairs well with this guide as a planning tool.
What you will need
Tools and Supplies You'll Need
None of the tasks below require professional-grade equipment. A basic toolkit is all that's necessary. Before you start, gather your supplies so you're not hunting for a wrench mid-task with water running.
Garden hose
Used to direct drained water from the water heater to a floor drain or outside.
Flathead screwdriver
Helps remove aerator screens and pry off faucet covers.
Adjustable pliers or slip-joint pliers
Loosens stubborn aerators and supply line connections safely.
Bucket
Catches residual water when disconnecting supply lines or draining fixtures.
Replacement washers and aerator screens
Used to restore proper flow and seal after cleaning fixture aerators.
Pipe thread tape (plumber's tape)
Re-seals threaded connections if you remove and reattach supply hoses.
If your home has a tankless water heater rather than a storage tank model, the flushing step below doesn't apply in the same way - descaling a tankless unit has its own procedure. The comparison of tankless vs. traditional water heaters covers what upkeep each type requires.
Step-by-Step: The Maintenance Tasks
Know Your Limits Before You Start
The tasks in this guide involve only fixture-level and appliance-level upkeep - they do not touch gas lines, main supply connections, or any work typically requiring a permit. If you encounter a corroded pipe, smell gas, see water staining inside walls, or are unsure about what you're looking at, stop and contact a licensed plumber. Attempting repairs beyond your skill level can cause water damage, code violations, or serious injury.
Test every accessible shutoff valve
Under every sink, behind every toilet, and feeding your washing machine and dishwasher, you'll find individual shutoff valves. These are your first line of defense against a burst hose or leak. Turn each valve fully clockwise (off), then fully counter-clockwise (on) once a year. A valve that hasn't moved in years can seize, leaving you powerless during an actual emergency.
If a valve resists turning or drips around its stem when exercised, that's a sign to have a plumber inspect it - don't force it.
Clean faucet aerators and showerheads
The aerator is the small mesh screen screwed onto the tip of a faucet spout. Mineral deposits and debris collect in the screen over time, reducing flow and affecting water pressure. Unscrew the aerator by hand or with a wrapped pair of pliers (wrap with tape to protect the finish). Drop the parts into a cup of undiluted white vinegar for 20-30 minutes, rinse thoroughly, and reassemble.
For showerheads, unscrew the head, soak it the same way, and use an old toothbrush to scrub out stubborn deposits before rinsing and reattaching.
Inspect supply hoses on toilets, sinks, and appliances
Braided supply hoses connect your shutoff valves to toilets, faucets, and appliances like dishwashers and washing machines. These hoses degrade over time. Look for bulging, cracking, corrosion at the fittings, or any moisture around connections. A washing machine hose failure is among the most common causes of significant home water damage.
Rubber hoses are generally recommended for replacement every five to seven years. Stainless-steel braided hoses tend to last longer but still warrant annual visual inspection.
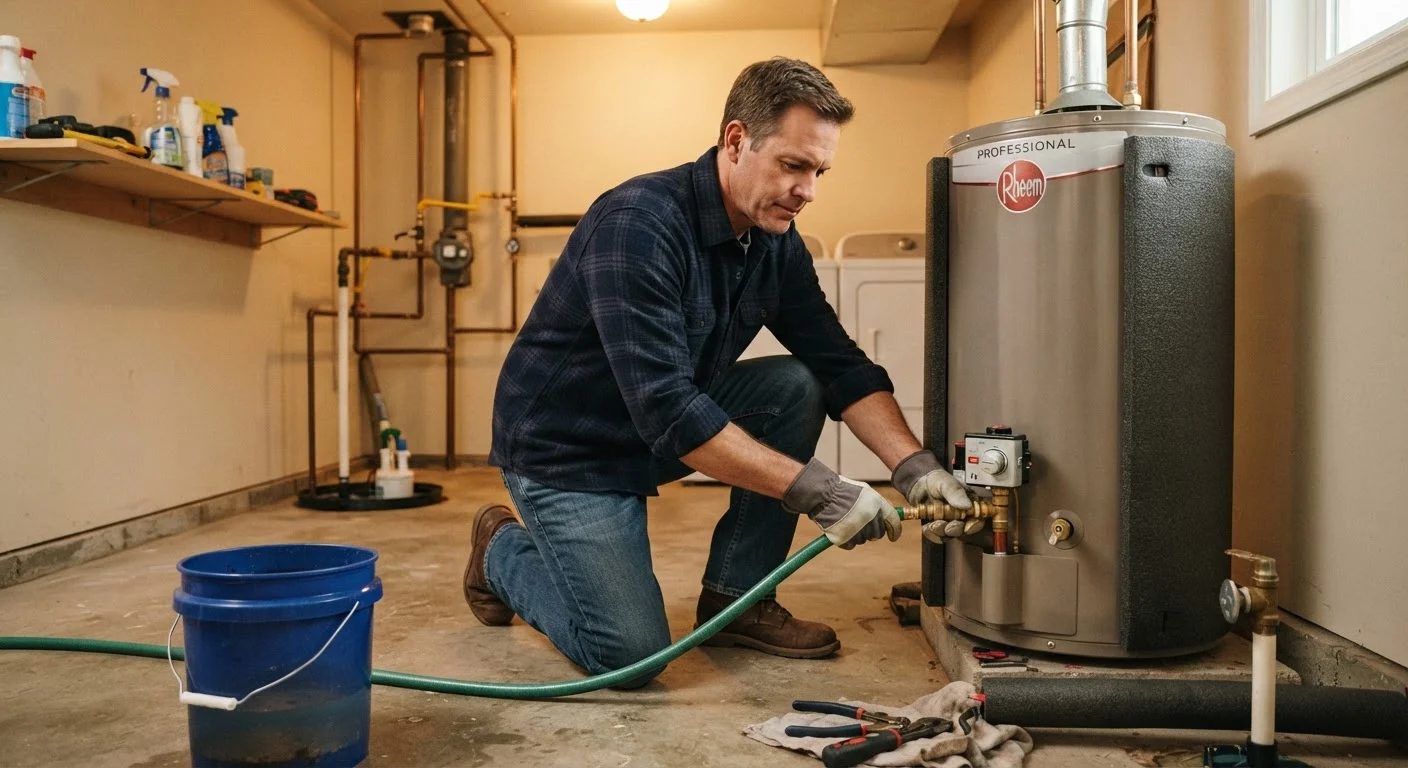
Flush sediment from your tank water heater
Over time, mineral sediment settles at the bottom of a storage water heater tank. This sediment insulates the water from the heating element, forcing the unit to work harder and shortening its lifespan. Flushing the tank annually removes buildup and improves efficiency.
- Turn the thermostat to the lowest setting (or the 'vacation' setting) and turn off the cold water supply valve to the heater.
- Connect a garden hose to the drain valve near the base of the tank and route the other end to a floor drain or outside.
- Open a nearby hot water faucet to allow air into the system, then open the drain valve.
- Allow water to flow until it runs clear. If sediment is heavy, briefly open the cold supply to stir up the remaining deposits, then drain again.
- Close the drain valve, disconnect the hose, restore cold water supply, and return the thermostat to your normal setting.
Check for slow leaks under sinks and around toilets
Open every under-sink cabinet and look for water stains, warped wood, or any moisture on the supply lines, drain connections, or P-trap (the curved pipe section). At each toilet, press a dry paper towel around the base and check for any moisture - a leak at the wax ring typically appears as water seeping out when the toilet is flushed.
A toilet that 'runs' between flushes usually has a worn flapper. Flappers are inexpensive and straightforward to replace - it's one of the most commonly successful DIY plumbing repairs.
Clear slow-draining fixtures before they fully clog
Slow drains in bathroom sinks and tubs are almost always caused by hair and soap scum accumulating just below the drain stopper - not deep in the pipe. Use a drain snake or a plastic hair-removal tool (a thin flexible stick with barbs) to pull the blockage out manually. Avoid chemical drain cleaners as a routine practice; they can damage older pipes and provide only temporary relief without removing the actual clog.
For kitchen sinks, running hot water through the drain after washing greasy dishes, and occasionally flushing with dish soap and hot water, helps keep the drain clear.
When to Call a Licensed Plumber Instead
Knowing where the boundary is matters just as much as knowing how to turn a wrench. Contact a licensed plumber if you encounter any of the following:
- Water staining or soft spots on walls, ceilings, or floors - signs of a hidden leak
- A shutoff valve that won't close fully or drips at the stem after exercising
- Any work involving the main supply shutoff, new pipe runs, or fixture installation requiring a permit
- A water heater with visible rust on the tank body, a faulty pressure-relief valve, or persistent pilot light issues (gas units)
- Persistent sewer odors, which may indicate a venting problem or a failed drain trap
The pattern here mirrors advice in other home trades. Just as some electrical tasks belong with a licensed electrician, some plumbing work genuinely exceeds the scope of DIY. Recognizing that line protects both your home and your safety.
These maintenance habits also pair naturally with other overlooked upkeep tasks. The tasks new homeowners most commonly overlook - including dryer vent cleaning and caulk inspection - are worth reviewing alongside this plumbing checklist.