

Key Takeaways
What You're Getting Into Before You Begin
A bathroom retile is one of the more rewarding home improvement projects a homeowner can tackle - the transformation is visible immediately, and it directly addresses water infiltration risks that quietly worsen over time. It is also one of the more physically demanding DIY projects, involving demolition, heavy materials, precise cuts, and multi-day cure times. Understanding the full sequence before you start is what separates a smooth project from one that stalls mid-demo.
Before purchasing tile or tools, consider the scope clearly. Are you retiling just the floor, or the shower surround and walls as well? Wall tile and floor tile have different thickness, slip-resistance, and adhesive requirements - they are not interchangeable. Familiarize yourself with terminology you'll encounter; our plain-English renovation glossary is a useful reference to have open while you work.
Also think through costs beyond materials. Disposal of old tile, replacement of damaged substrate, and rental equipment add up quickly. Our article on renovation costs homeowners frequently overlook can help you build a more accurate budget before you commit.
Water and Electrical Safety First
Before demolition begins, shut off the water supply to the bathroom and identify any electrical circuits serving the space. Older homes may have wiring running through walls directly behind tile. If you encounter wiring, pipes, or signs of active water damage during demo, stop work and consult a licensed plumber or electrician before continuing.
Tools, Materials, and What You'll Need
Gathering everything before the first tile comes off the wall prevents mid-project trips to the hardware store that derail momentum. Review the prerequisites below to confirm you have the foundational skills and access this project requires, then check the tool list to ensure you are fully equipped.
What you will need
Cold chisel and hammer
Used to break the bond between old tiles and the substrate during demolition.
Wet tile saw
Makes precise, clean cuts on ceramic, porcelain, or stone tile without cracking.
Notched trowel
Applies thinset adhesive at a consistent depth for proper tile bonding.
Tile spacers
Maintain consistent grout joint width across the entire installation.
Rubber float
Presses grout into joints and removes excess without scratching tile surfaces.
Level and chalk line
Ensures tiles are installed plumb and square from the correct starting reference point.
Cement backer board and screws
Provides a stable, moisture-resistant substrate behind tile in wet areas.
Grout sealer
Applied after grout cures to protect joints from staining and moisture infiltration.
Older Tile May Contain Asbestos
Tiles and adhesives installed before approximately 1980 may contain asbestos, which is hazardous when disturbed. If you are unsure of your home's construction era or the materials involved, have a certified inspector test a sample before any demolition. Do not grind, sand, or break suspect tile without professional guidance.
Step-by-Step: The Retile Process
Follow these steps in order. Skipping ahead - particularly setting tile before the substrate is fully prepared - is the most common reason retile projects fail prematurely. Patience between phases pays off in a result that holds for years.
Protect the space and remove fixtures
Cover the toilet, vanity, and floor drain opening with plastic sheeting and tape. Remove any accessories mounted to the walls - towel bars, soap dishes, outlet covers. If the project involves the shower surround, you will likely need to remove the faucet trim and showerhead; turn off the water supply before doing so. Keep removed hardware in a labeled bag so reinstallation is straightforward.
Demo the old tile
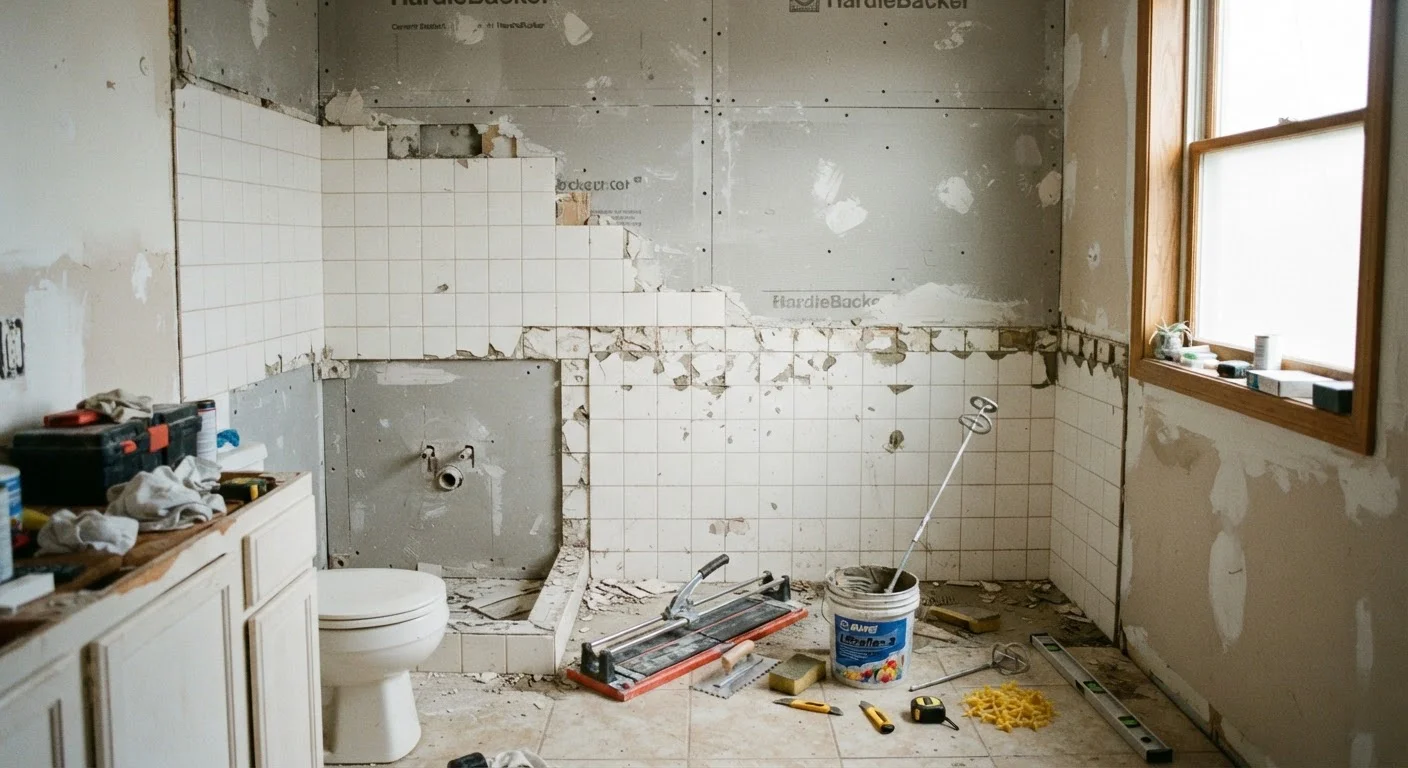
Begin at a grout joint or corner using a cold chisel held at a low angle. Strike firmly with a hammer to break the tile free from the substrate. Work methodically row by row. Expect this phase to be slow - tiles bonded with old mastic or mortar can be stubborn. Collect debris in heavy-duty contractor bags as you go to prevent tripping hazards.
Evaluate and prepare the substrate
Once tile is removed, inspect the exposed wall surface carefully. Drywall that has absorbed moisture - indicated by soft spots, discoloration, or crumbling - must be cut out and replaced. In wet zones (the shower surround and areas within direct water splash range), standard drywall is not an acceptable substrate; install cement backer board instead. Screw backer board to studs at the spacing specified by the manufacturer, and tape seams with alkali-resistant mesh tape. A flat, solid substrate is non-negotiable for tile that lasts.
Plan your layout
Find the center point of each wall or floor section and snap chalk lines to create a grid. This is your reference for keeping rows straight and planning where cut tiles will fall. Aim to have the largest cut pieces at the most visible edges of the room. For floors, consider where the eye naturally travels when entering - that sightline should have full or near-full tiles. Adjust your starting point based on the dry-lay you performed before mixing any adhesive.
Set the tile
Mix thinset mortar to a peanut-butter consistency - it should hold a notch without slumping. Apply it to the substrate with the flat side of a notched trowel first, then comb with the notched side to create ridges. Press each tile firmly with a slight twist to collapse the ridges and ensure full contact. Place spacers at every corner joint. Use a level frequently to confirm tiles are sitting plumb and flush with their neighbors. Cut edge tiles with the wet saw as you reach walls. Work in manageable sections so thinset doesn't skin over before tiles are placed.
Allow thinset to cure, then grout
Let the thinset cure fully - typically 24 hours, though follow the manufacturer's guidance based on temperature and humidity in your space. Remove spacers once the tile is firm. Mix unsanded grout for joints under 1/8 inch or sanded grout for wider joints. Press grout diagonally across joints with a rubber float, packing it firmly. Wipe excess with a damp sponge in circular motions, rinsing frequently. A light haze will remain - buff it off with a dry cloth after 20-30 minutes. Do not walk on grouted floors for at least 24 hours.
Seal grout and reinstall fixtures
Allow grout to cure for the period specified on the packaging - typically 48 to 72 hours - before applying a penetrating grout sealer. Apply sealer with a small brush or applicator along each joint, wipe any excess off tile faces promptly, and allow it to absorb. Apply a second coat if directed. Once sealed, reinstall fixtures, trim, and accessories. Apply a fresh bead of silicone caulk (not grout) at any inside corner where two tiled surfaces meet - this joint needs to flex slightly and grout will crack there over time.
Dry-Lay Your Tiles Before Committing
Before mixing any thinset, lay out a full row of tiles on the dry floor or wall to check your pattern, spacing, and how cuts will fall at the edges. Adjusting your starting point by just an inch can eliminate a sliver cut at one end of the room and make the finished result look far more professional.
After the Project: Ongoing Maintenance
A freshly tiled bathroom looks great, but its longevity depends on a few simple habits. Re-seal grout annually in high-moisture areas like shower surrounds - the sealer breaks down gradually with exposure to water and cleaning products. Inspect the caulk at all inside corners and along the tub or shower base at least twice a year, and replace it at the first sign of cracking or separation. These are exactly the kinds of routine maintenance tasks that prevent avoidable water damage in the long run.
If you are planning additional renovation work beyond the bathroom, the same methodical approach applies in other rooms. Our kitchen renovation planning checklist offers a comparable room-by-room framework for tackling that space with equal confidence.